Showing posts with label Tutorials. Show all posts

Saturday, February 14, 2015

Alladin's "Step-by-Step" #1: Grey Knight Strike Squad (pt.10) - COMPLETED!

Well, after almost 16 months (on and off, clearly) of work, I *finally* have my 5 Grey Knights painted. This brings my count up to a whopping 10 fully painted figures for my GK army.


The final step was the Nemesis Force Weapons. I had squirreled away my ratios somewhere, over a year ago, and managed to find them, which gave me at least some base to work with.

Thursday, February 12, 2015

Alladin's "Step-by-Step" #1: Grey Knight Strike Squad (pt.9)

So here we are, the second-last part of my first Step-by-Step. Almost 2 years in the making, we are at the final countdown. This one will be a big one, as it encompasses pretty much all the remaining "fine-detail" work aside from the Nemesis Force Weapons. I have been trying to find the time to get this part written up for a while, but haven't been able to until now.

Thursday, January 15, 2015

Alladin's "Step-by-Step" #1: Grey Knight Strike Squad (pt.8)

Unlike the spectacle of my previous post, I will *really* try and keep this one short and sweet. Here we go. THIS IS A PICTURE OF GOLD SHADING AND MID-TONES:


Thursday, December 11, 2014

Alladin's "Step-by-Step" #1: Grey Knight Strike Squad (pt.7)

 A bit of a delay getting this one up, but as usual I got distracted with other things and that spread out my painting time dramatically.

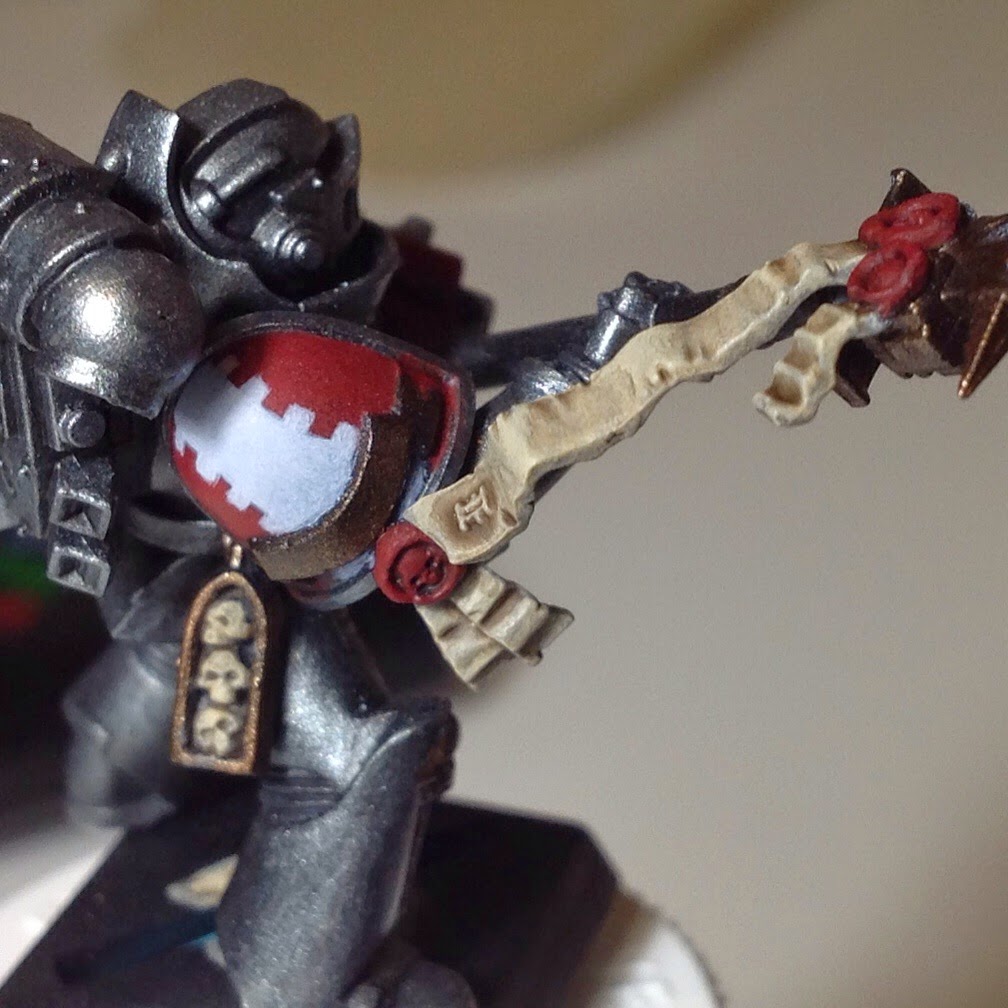
With this post, I have officially started on the highlighting (mid-toning, I guess, but still! Progress!). As mentioned in the previous post, I have done all my washes for shading purposes, and now I am at the point of bringing out the colours one by one. Without further ado (and because I have so many bloody formulas to copy down), here are some pics:

These two highlight the shading for the reds (mainly 1st pic), and the beige/parchment (lower pic). They will look much better with further highlighting.

With the reds in particular, I went pretty random with the way the light hits the stormbolter. When doing shading, I try to pick a "virtual light source," generally coming from above, and try to stick to it, but after about 30 seconds I just throw any principles out the window and go somewhat random. At this point in the game, my skills are simply not that good to replicate realistic light physics.

Maybe, after I paint 50 of these buggers, I will have a better grasp of light physics. For now I just tried to make it look *somewhat* plausible, and hope that I don't end up associating with superior painters down the road, so I am not secretly mocked at my impossible light sources.

More pics & everything else after the break.


Friday, November 28, 2014

Alladin's "Step-by-Step" #1: Grey Knight Strike Squad (pt.6)

While Thursday was Thankgiving for our southern neighbours, it was just another day off for me. The result? Another productive day of painting. I managed to get the blue mid-tones completed, and I feel the momentum building to finally finishing this project. I used a new paint colour - VGC Magic Blue - and while I initially thought it was still too bright, I am happy with the result. I still need to do some selective washes for shading, and then a lighter highlight for some edging. The results are shown below.


Friday, November 21, 2014

Alladin's "Step-by-Step" #1: Grey Knight Strike Squad (pt.5)

Well, yesterday was a productive day on the painting front!

I managed to get the base layer done for all the purity seals/books, so, aside from the NFW and other glow-y bits, my models are now fully base coated.

It's amazing what a little beige does for the look of a model, I remember getting to this point with my last batch of GKs and feeling the first real sense of accomplishment. Of course, I still have a ways to go, but hopefully now that I am done the uphill scramble it will be smooth sailing from here on in.

Here is another shoddy group shot of the WIPs:


Tuesday, November 18, 2014

Alladin's "Step-by-Step" #1: Grey Knight Strike Squad (pt.4)

AKA, I hate painting white.

Well, after struggling through 4 painting sessions, I finally have finished with the white layers on the Purifier helmets and shoulder pads. What a bloody pain.

I am not sure if VGC Bone White is just crap, or if my bottle specifically is crap, or if I am crap, but the amount of layers I put down to get a decent white coverage is obscene. The sad thing is, if I really wanted to, I could keep going, since there are still some imperfections. I just can't be bothered..

Check out the shoddy progress pic below:


Friday, October 10, 2014

Alladin's "Step-by-Step" #1: Grey Knight Strike Squad (pt.3)

For the third part of my Step-by-Step, I am focusing on completing the basecoat colours for the remaining sections of the models. As we are getting into the finer detail on the miniatures, this starts to make sense as you want to minimize the damage done from errant brushstrokes.

The first colour to go on was VGC Heavy Red. I use this for my purity seals, as well as the main accent colour for my Strike Squad and Terminator troops. At first I was applying a 1 : 1 ratio of Heavy Red and Magic Wash. However, the Heavy Red I own is one of my least viscous paints, and diluting it further made it act more like a wash than a base paint. As such, I applied it "uncut" and it seemed to work quite well. Even so, I still needed to go over a few coats on some areas to get good coverage.

Tuesday, September 30, 2014

Alladin's "Step-by-Step" #1: Grey Knight Strike Squad (pt.2)

Finally!

For part 2 of the step by step, I will be focusing on the golds and main colour (in this case red for generic Strike Squad, blue for Purifiers). As I have not touched a paintbrush in almost a year, my skills need a bit of de-rusting, and my paint times will likely be much longer for each step. Hopefully this is the last time I take such a ridiculously long break from painting.

Thursday, August 21, 2014

Mini-Tutorial: DIY Twin-Linked Brainleech Devourers (part 2)

Well that was fast!

After playing around with some Green Stuff, I have completed the first arm!

This took a lot longer as I am still very much a novice when it comes to sculpting. However, all things considered, I am happy with the result.

As for the second arm, I decided to re-pose the claw as it was drooping down quite significantly. I clipped the claw as best as I could to avoid collateral tissue/chitin damage, then after a bit of clean-up with the hobby knife I drilled and pinned the claw back on at better angle. This was followed by a fairly successful Green Stuff fill-in.

I still have a bit of cleanup (mold lines, etc.) to do on both arms, but will wait until the Green Stuff has dried.

Pictures below. Hope this tutorial was actually useful!


(As a side-note, since I had to do sculpting anyway, I managed to finish magnetizing my Tervigon arm sockets, as well as all 3 sets of Trygon/Mawloc talon sockets, as well as the Trygon/Mawloc head carapace, jaw area and pincer sockets! I still need to drill and magnetize the talons, pincers, and remaining head carapace, but all-in-all a productive day!)

Finally, a pic of the Devourer on my Carnifex... and yes, I do realize that the radical angle I decided to place the arm magnet is a bit odd. Live and learn.

Mini-Tutorial: DIY Twin-Linked Brainleech Devourers (part 1)

In a first for this blog, I attempt to post something actually useful!

This morning I decided to jump in and get started on my brainleech devourers. Previously, I had scoured the net for inspiration, and found a lot of great resources. Of course, now that Forgeworld makes their own, there is always the option to buy them. However I still find them to look a bit flimsy, and besides they are super expensive and hard to come by.

With my research complete I decided I wanted to use Crushing Claws as the base for my conversion. I first saw this idea used on a showcase that GW had featured on their online blog (now gone). However, a bit of Google Image searching paid off, and here is a link to the owner's Hive Fleet Titan flickr feed. There are a lot of great conversion ideas on there, and I don't assume to come anywhere close to his skill level.


Tuesday, February 04, 2014

Today's special: Aluminum & Lead

Today I put the finishing touches on my brand new Light Box (Mk.1). I opted to go with a white background for now (for lack of a colour printer), using a pretty ghetto backdrop of 8.5"x11" pages glued together with double-sided tape.

Ta-Da!!!

Friday, January 17, 2014

Alladin's "Step-by-Step" #1: Grey Knight Strike Squad (pt.1)

Hello again!

After completing my first 5 Knights, I am moving onto the next batch of 5. These ones will be painted a bit differently: 4 of them will be painted up as Purifiers, with the 5th painted in my general Strike Squad colours. The focus will be on the Strike Knight, but will include WIPS of the entire 5-man process for posterity's sake, as well as colour combos and tips that may be unique to the Purifiers for anyone who is interested.

Additionally, I am a notoriously slow painter so part of my process will be to time my work and keep a tally of how much time I spend painting each section. This is more for my own use than for my readers' sake; a way for me to keep track of my progress as I (hopefully) improve both my quality and painting speed.

Tuesday, December 03, 2013

Terrain Tutorial #1 - Introduction and Materials

One of the many projects that I currently have on the go is a collection of Imperial Sector terrain. In a previous post, I have put some pictures up of the buildings themselves, which are essentially assembled, short of perhaps a few bits to add here and there.

However, now I am tasked with finishing them, which includes putting them on a sturdy base, adding debris and battle damage, and then ultimately paint them all up. This series of tutorials will hopefully document my progress in a way that can be useful for others.

Tuesday, October 01, 2013

Painting Tutorial #1: Introduction & Materials

After a pretty long break from painting, I got back into it recently and started the long task of getting my force painted up. Until now, I had only primed a few models, and had been honing my painting skills by painting the interior of my Rhino/Razorback. Looking back, I DID paint a test figure earlier this year using an old metal GKSS figure, but I found it was a bit too bright for my liking and put off painting the rest until now.

In any case, I have decided to put together some tutorials to help others in their path to improve their painting skills.