Showing posts with label Step-by-Step. Show all posts

Sunday, May 29, 2016

Hive Fleet Ceryx - Paint Formulas

This post will be pretty boring, as I am just outlining the paint ratios/techniques I used for my Tyranids. It's mainly a post for my own reference, so apologies to my legion of rabid fans... 


--

First I primed the models using Rustoleum Grey Spray Primer. I painted the bases next because there is a lot of messy drybrushing that I did not want to get on the model itself.

Tyranid Bases:

1:1  -  VGC Charred Brown : Magic Wash

This was applied as the basecoat.

1:1  -  VGC Heavy Ochre : Magic Wash

First Layer, allied everywhere but the sides and the recesses.

1:0  -  GW Agrax Earthshade Wash

A nice coat over the Ochre to get the shading down.

1:3  -  VGC Heavy Ochre : GW Yriel Yellow

This was the first drybrush. Applied more liberally to bring out the brightness. (n.b. I originally used VGC Sun Yellow but this is a shitty shitty paint that separates and flakes like a mofo, so I have substituted it. I am sure it won't make a big difference in the overall look.)

1:0  -  VGC Bonewhite

This was a light drybrush to pick out the raised detail in the bigger rocks & rock slabs.


Tyranid Skin:

1:1  -  VGC Somber Grey : Magic Wash

This was applied quickly over all the regular "skin" areas.

1:0  -  GW Drakenhof Nightshade

A wash over the skin areas. Make sure to get all the nooks and crevasses, the smaller bugs are especially tricky for this.

1:0  -  Somber Grey 

This was a quick drybrush to lighten areas that were washed too dark (and likely unnecessary, but is done so quickly that it does not slow down paint time at all)

1:0  -  VGC Cold Grey

Another drybrush as a highlight, also relatively quick and dirty.
 
1:0  -  Magic Wash 

This just gives the skin a nice sheen.


Chitin:

1:1  -  VGC Cold Grey : Magic Wash

This is relatively straightforward.

1:0  -  GW Nuln Oil

Easy - just wash all chitin areas with a thick layer of wash. Don't be stingy! (Edit: I may have done two coats, or at least one good one and then added a quick second layer in the recesses for more definition.)

1:2  -  VGC Cold Grey : Magic Wash

This first step is mainly to lighten the chitin, using a wet-brush technique, feather all areas of chitin, pulling the brush from the inner part of the plate to the edge. Do this a few times over each plate to get the ridge effect started.

1:1  -  VGC Dead White : Magic Wash

As above, but try and make the lines thinner. Many quick feather coats will be required to give it the proper texture.

Afterwards, use the ratio above to edge highlight the chitin plates to finish them up.


Claws/Teeth:

2:1:1  -  VGC Heavy Red :VGC Black : Magic Wash

Go over the claws and teeth/gums with the above ratio. 2 coats may be necessary. (For teeth/gums, skip to last step)

2:1  -  VGC Heavy Red : Magic Wash

Use one or two coats to start bringing the dark base up to a proper red. Leave the base of each claw the original colour, and apply it to the last 90% (approx) of the claw. With each subsequent coat, apply to a smaller percent of the claw, going from dark to light as you get to the tip.

1:1  -  VGC Gory Red : Magic Wash

Same as above, focus more towards the end half of the claw. For larger class, Consider adding some streaks into the darker bits for texture. 

1:1  -  VGC Bloody Red : Magic Wash

This is the main edge highlight for the claws/Tyranid models, but may need to add more gradients to the bigger Monstrous Creature claws. A few streaks, edge highlighting, focus near the claw tips as above.

1:1  -  VGC Dead White : Magic Wash

Use this to pick out the teeth with a fine detail brush


Maws/Tissue & Joint Ribbing:

This to me is the most tedious step, because you are painting small, often recessed areas while trying not to ruin the  paint job around it. There may be a more efficient way of doing this, but I can't think of it.

2:1  -  VGC Heavy Red : Magic Wash

Apply this to the maw area around the teeth/gums, and to any ribbing/exposed joints. Two coats will be required at a minimum, due to the stupid nature of VGC Heavy Red.

1:0  -  GW Agrax Earthshade

Carefully apply this wash to the areas painted above, making sure it does not bleed to other areas.
 
1:1:1:1:?  -  VGC Dead White : VGC Fiery Orange : VGC Bloody Red  :  VGC Heavy Red : Magic Wash

(Not exactly sure about the ratio of wash, 1-2 is probably fine) This makes a lot of paint for a very small area. However, there is no easy way around it. Basically you are using this with a wet-brush technique to edge highlight the ridges on the skin and the maws

1:0 Magic wash

As with the skin, this just makes it a bit more glossy and organic.


Eyes:

1:1  -  VGC Dark Green : Magic Wash

Easy, just go over the entire eye, may need two coats to get a good green base.

1:1  -  VGC Escorpena Green : Magic Wash

Again, go over most of the eye with this. Leave a bit of dark green in the deeper part of the eye.

1:1  -  Dead White : Magic Wash

This would be used to add a little reflective "dot" on the eye of bigger Tyranids. Don't bother on the smaller models.


Tongue:

1:1  -  VGC Royal Purple : Magic Wash

Use this to basecoat the tongues of your models.

2:1:2  -  VGC Dead White : VGC Royal Purple : Magic Wash

This is the edge highlight for the tongue.

(n.b. For the larger bugs, you can consider washing the purple basecoat with either a GW purple wash or possibly just Nuln Oil. Then use a mid purple as a mid-tone before adding the highlights above.)

--

And that's it! Will add more to this as I get to it (i.e. Leathery wings, various Tyranid guns, Zoanthrope brain tissue, etc.)


Saturday, February 14, 2015

Alladin's "Step-by-Step" #1: Grey Knight Strike Squad (pt.10) - COMPLETED!

Well, after almost 16 months (on and off, clearly) of work, I *finally* have my 5 Grey Knights painted. This brings my count up to a whopping 10 fully painted figures for my GK army.


The final step was the Nemesis Force Weapons. I had squirreled away my ratios somewhere, over a year ago, and managed to find them, which gave me at least some base to work with.

Thursday, February 12, 2015

Alladin's "Step-by-Step" #1: Grey Knight Strike Squad (pt.9)

So here we are, the second-last part of my first Step-by-Step. Almost 2 years in the making, we are at the final countdown. This one will be a big one, as it encompasses pretty much all the remaining "fine-detail" work aside from the Nemesis Force Weapons. I have been trying to find the time to get this part written up for a while, but haven't been able to until now.

Thursday, January 15, 2015

Alladin's "Step-by-Step" #1: Grey Knight Strike Squad (pt.8)

Unlike the spectacle of my previous post, I will *really* try and keep this one short and sweet. Here we go. THIS IS A PICTURE OF GOLD SHADING AND MID-TONES:


Thursday, December 11, 2014

Alladin's "Step-by-Step" #1: Grey Knight Strike Squad (pt.7)

 A bit of a delay getting this one up, but as usual I got distracted with other things and that spread out my painting time dramatically.

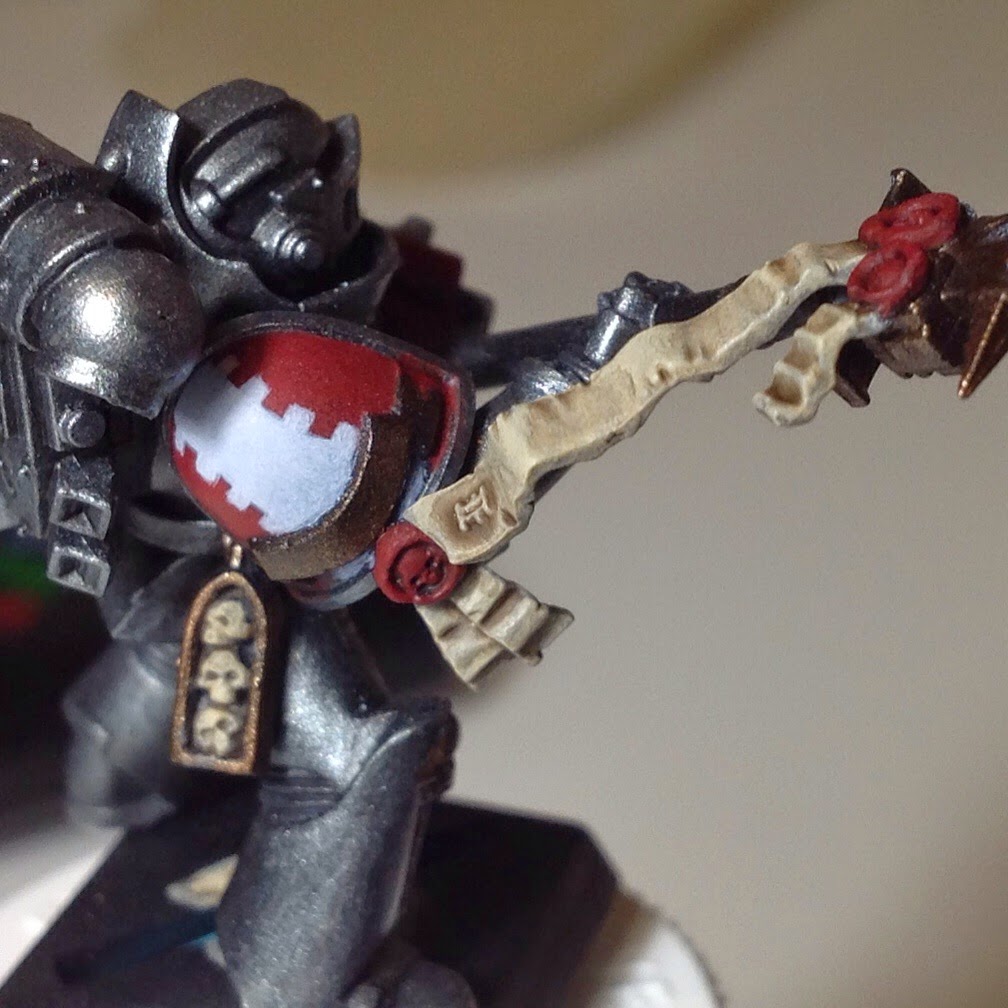
With this post, I have officially started on the highlighting (mid-toning, I guess, but still! Progress!). As mentioned in the previous post, I have done all my washes for shading purposes, and now I am at the point of bringing out the colours one by one. Without further ado (and because I have so many bloody formulas to copy down), here are some pics:

These two highlight the shading for the reds (mainly 1st pic), and the beige/parchment (lower pic). They will look much better with further highlighting.

With the reds in particular, I went pretty random with the way the light hits the stormbolter. When doing shading, I try to pick a "virtual light source," generally coming from above, and try to stick to it, but after about 30 seconds I just throw any principles out the window and go somewhat random. At this point in the game, my skills are simply not that good to replicate realistic light physics.

Maybe, after I paint 50 of these buggers, I will have a better grasp of light physics. For now I just tried to make it look *somewhat* plausible, and hope that I don't end up associating with superior painters down the road, so I am not secretly mocked at my impossible light sources.

More pics & everything else after the break.


Friday, November 28, 2014

Alladin's "Step-by-Step" #1: Grey Knight Strike Squad (pt.6)

While Thursday was Thankgiving for our southern neighbours, it was just another day off for me. The result? Another productive day of painting. I managed to get the blue mid-tones completed, and I feel the momentum building to finally finishing this project. I used a new paint colour - VGC Magic Blue - and while I initially thought it was still too bright, I am happy with the result. I still need to do some selective washes for shading, and then a lighter highlight for some edging. The results are shown below.


Friday, November 21, 2014

Alladin's "Step-by-Step" #1: Grey Knight Strike Squad (pt.5)

Well, yesterday was a productive day on the painting front!

I managed to get the base layer done for all the purity seals/books, so, aside from the NFW and other glow-y bits, my models are now fully base coated.

It's amazing what a little beige does for the look of a model, I remember getting to this point with my last batch of GKs and feeling the first real sense of accomplishment. Of course, I still have a ways to go, but hopefully now that I am done the uphill scramble it will be smooth sailing from here on in.

Here is another shoddy group shot of the WIPs:


Tuesday, November 18, 2014

Alladin's "Step-by-Step" #1: Grey Knight Strike Squad (pt.4)

AKA, I hate painting white.

Well, after struggling through 4 painting sessions, I finally have finished with the white layers on the Purifier helmets and shoulder pads. What a bloody pain.

I am not sure if VGC Bone White is just crap, or if my bottle specifically is crap, or if I am crap, but the amount of layers I put down to get a decent white coverage is obscene. The sad thing is, if I really wanted to, I could keep going, since there are still some imperfections. I just can't be bothered..

Check out the shoddy progress pic below:


Friday, October 10, 2014

Alladin's "Step-by-Step" #1: Grey Knight Strike Squad (pt.3)

For the third part of my Step-by-Step, I am focusing on completing the basecoat colours for the remaining sections of the models. As we are getting into the finer detail on the miniatures, this starts to make sense as you want to minimize the damage done from errant brushstrokes.

The first colour to go on was VGC Heavy Red. I use this for my purity seals, as well as the main accent colour for my Strike Squad and Terminator troops. At first I was applying a 1 : 1 ratio of Heavy Red and Magic Wash. However, the Heavy Red I own is one of my least viscous paints, and diluting it further made it act more like a wash than a base paint. As such, I applied it "uncut" and it seemed to work quite well. Even so, I still needed to go over a few coats on some areas to get good coverage.

Tuesday, September 30, 2014

Alladin's "Step-by-Step" #1: Grey Knight Strike Squad (pt.2)

Finally!

For part 2 of the step by step, I will be focusing on the golds and main colour (in this case red for generic Strike Squad, blue for Purifiers). As I have not touched a paintbrush in almost a year, my skills need a bit of de-rusting, and my paint times will likely be much longer for each step. Hopefully this is the last time I take such a ridiculously long break from painting.

Friday, January 17, 2014

Alladin's "Step-by-Step" #1: Grey Knight Strike Squad (pt.1)

Hello again!

After completing my first 5 Knights, I am moving onto the next batch of 5. These ones will be painted a bit differently: 4 of them will be painted up as Purifiers, with the 5th painted in my general Strike Squad colours. The focus will be on the Strike Knight, but will include WIPS of the entire 5-man process for posterity's sake, as well as colour combos and tips that may be unique to the Purifiers for anyone who is interested.

Additionally, I am a notoriously slow painter so part of my process will be to time my work and keep a tally of how much time I spend painting each section. This is more for my own use than for my readers' sake; a way for me to keep track of my progress as I (hopefully) improve both my quality and painting speed.